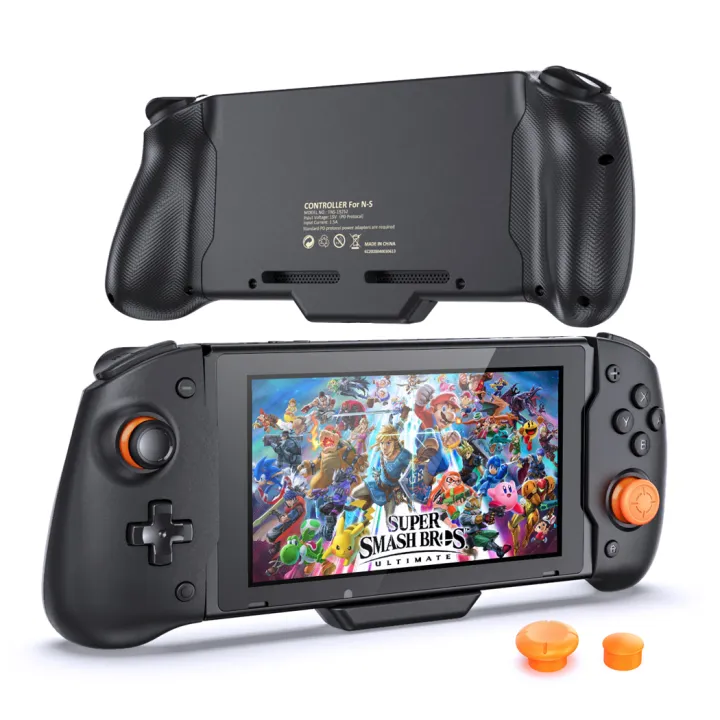
Sprig gaming controller
Summary
At the start, we have the Sprig console. It’s a great hardware development kit, but… it’s has yet become an actual gaming controller. So, I’m going to make it one. Why? Good question. I hope to answer that in the next section.
Problem
You see, I haven’t built a game for Sprig yet. (Very sad, I know.) Therefore, this project has two goals:
-
Build a game for Sprig I’m going to finish my game first, and then I’ll submit it to the gallery (and hopefully it’s going to be a playable, 5-minute game).
-
Build a case for the console Now, you might ask, “why a case?” Well, I’m glad you asked. The Sprig console is a great piece of hardware, but it’s not very portable. It looks a bit bulky, and it’s not very easy to carry around. It’s also not very cool-looking (for anyone who doesn’t know what it is).
There’s also a sneaky third goal, but I’ll get to that later.
Before we get into the details, here’s a disclaimer: I’m not a professional game developer. I’m not a professional hardware developer. I’m not a professional anything. I’m just a 14-year-old kid who likes to make things. So, if you see something that’s wrong, please let me know.
Plan
Here’s the plan:
- Build a game for Sprig and submit it to the gallery
- (Hopefully) get feedback on the game and get it approved
- Start on Sprig case design
- Build the case and test it (ergonomics, etc.)
- Sprig shipped to me! (I’m in Singapore, so it’s going to take a while)
- Test on Sprig and make any necessary changes
In more detail:
Build a game for Sprig and submit it to the gallery
I’m going to build a game called “Sprig Runner”. It’s a simple game where you have to avoid obstacles and collect coins. Once I’m done, I’ll submit it to the gallery and hopefully it’ll get approved.
Start on Sprig case design
After I’m done with the game, I’ll start on the case design. I’m not sure what I will use to design it, but I’ll probably use Fusion 360. I’ll also need to figure out how to make the case. I’m thinking of using a 3D printer at my school, but that is very open to change.
Build the case and test it (ergonomics, etc.)
After wrapping up the design, I’ll start building the case together and test it. I’ll make sure it’s comfortable to hold and that it’s easy to use. Of course, the Sprig console will be inside the case, so I’ll have to make sure it fits, which brings me to the next step.
Sprig shipped to me
I’m in Singapore, so it’s going to take a while. I’ll probably get it in a few weeks (hopefully), after which I will test it with the case and make any necessary changes in the design or fitting.
Wait, what about the sneaky third goal?
I’m glad you asked. To be honest, I am not very experienced in hardware development. Most of the projects I’ve done are software-based, and I’ve never really embarked on such a large hardware project. So, I’m going to learn a lot from this project, from designing the case to building it to implementing it on the Sprig console. I’m also going to learn a lot about game development, which is something I’ve not done much of.
Budget
This is tricky. Since the Sprig console is going to be shipped to me free of charge, I’m not going to include it in the budget. Therefore, the budget is only for any spare parts I might need to buy. Therefore, the overall budget is just the amount of money I need to buy the parts for another Sprig console lol.
WARNING: THIS IS A VERY ROUGH ESTIMATE. I’M NOT SURE IF I’LL NEED ALL OF THESE PARTS, OR IF I’LL NEED MORE. AS I SAID, I AM NOT FAMIALIAR WITH HARDWARE DEVELOPMENT AND A LOT OF THINGS WILL CHANGE.
Sprig console
- Raspberry Pi Pico (RP2040)
- 160 x 128 1.8” ST7735R LCD Screen
- 12mm Square Tactile Buttons x 8
- MAX98357A class D audio amplifier
- AAA batteries x 2
- LEDs x 2
- 8 ohm 300mW speaker
| Product | Supplier/Link | Cost |
|---|---|---|
| Sprig console | Hack Club | $0.00 |
| Raspberry Pi Pico (RP2040) | Adafruit | $5.00 |
| 12mm Square Tactile Buttons x 8 | Adafruit | $2.50 |
| 160 x 128 1.8” ST7735R LCD Screen | Adafruit | $19.95 |
| MAX98357A class D audio amplifier | Adafruit | $5.95 |
| Total | $50.00 (accounting for shipping and taxes) |
So, tl;dr, I’m going to learn a lot from this project both in software and hardware development. It’s going to be a great experience.
P.S. I’m very open to suggestions of possible designs and improvements. Please let me know if you have any ideas!
P.P.S. I designed a logo for the project involving Orpheus… I will send it in the Slack channel soon™.
Appendix
This is a very rough estimate of what the case might look like. I’m not sure if I’ll use this design, but it’s a good starting point.
